Showing posts with label RR Restoration. Show all posts

12 Feb 2013

Diary of a Range Rover restoration - Part 4

Phil Wall is restoring a 1989 Range Rover Classic. We'll be bringing you regular updates on progress. To find the rest of the restoration diary use the label 'RR Restoration'


It's been a couple of weeks of slow progress, with the weather and family commitments preventing much time being spent on the Range Rover.  The kit for the new swivel hub arrived a couple of weeks ago, just in time for snow to stop play on the restoration front.

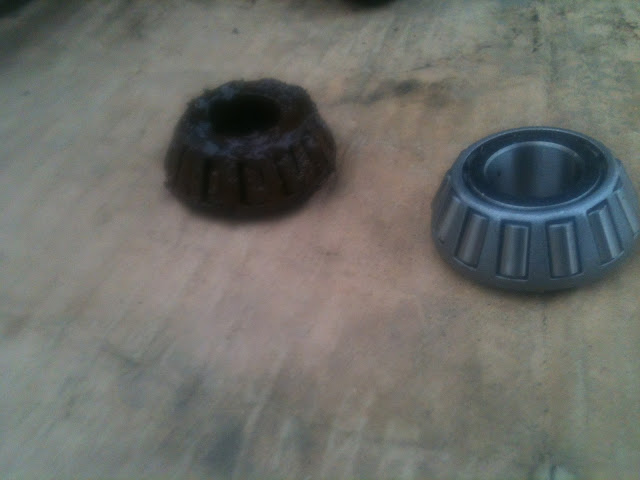
However, the kit is comprehensive with both sizes of oil seals and a tube of swivel ball grease.
The upper and lower swivel bearing tracks need fitting to the swivel housing - which I mentioned whilst visiting Wall Snr. A quick raid on the 'old' shed (Wall Snr is a man of multiple sheds) yielded an old cast iron arbour press. Excellent. Although it nearly gave me a hernia lifting it into the Discovery, I felt quite smug that I could fit the tracks neatly and squarely. Clearly, I would be doing a 'proper' job of fitting the tracks.


The smugness only lasted a short while, of course, as the press doesn't open wide enough to allow the swivel ball under the press.....

So, I resorted to placing the swivel housing on a piece of softwood and hammered in the tracks with a wooden mallet. Sorted!

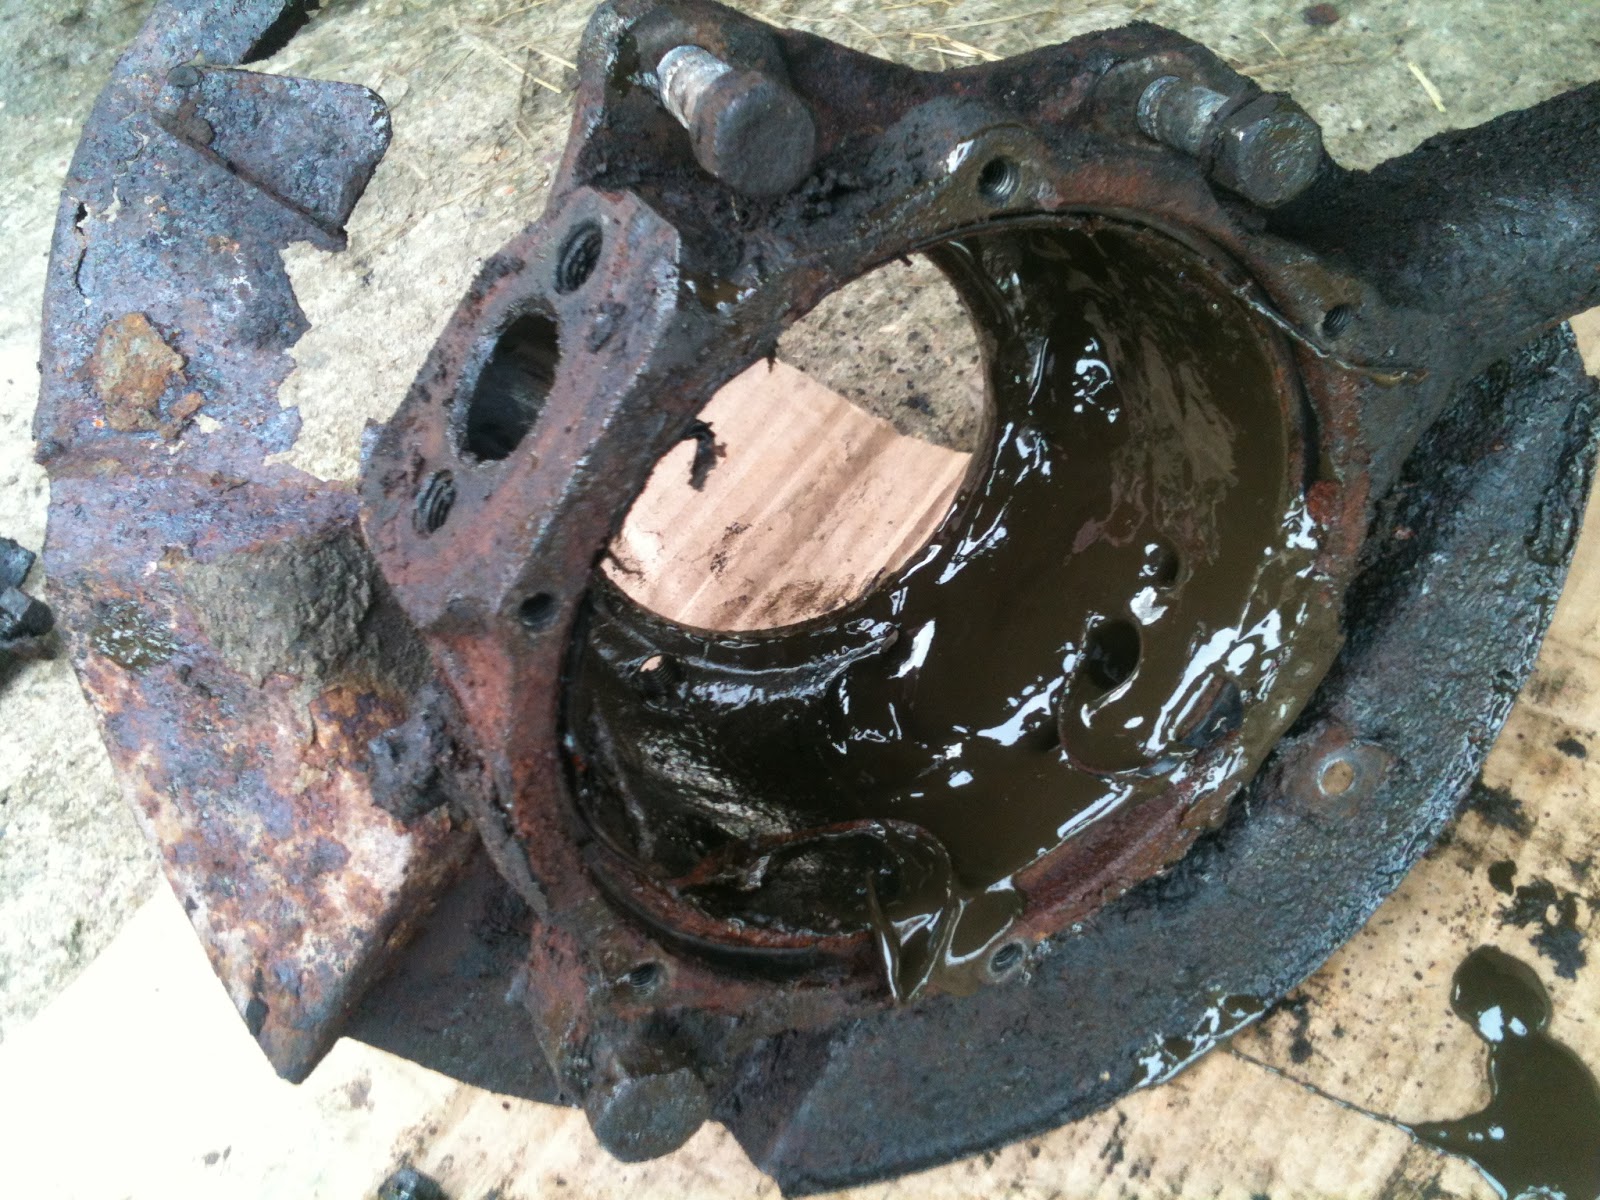
The mating face for the swivel hub had a gasket firmly attached which needed cleaning off - not as easy as I was expecting.....


.........and unfortunately, even though I was very careful, there is some small scratching from cleaning off the gasket.

I carefully fitted the small rear oil seal to the hub


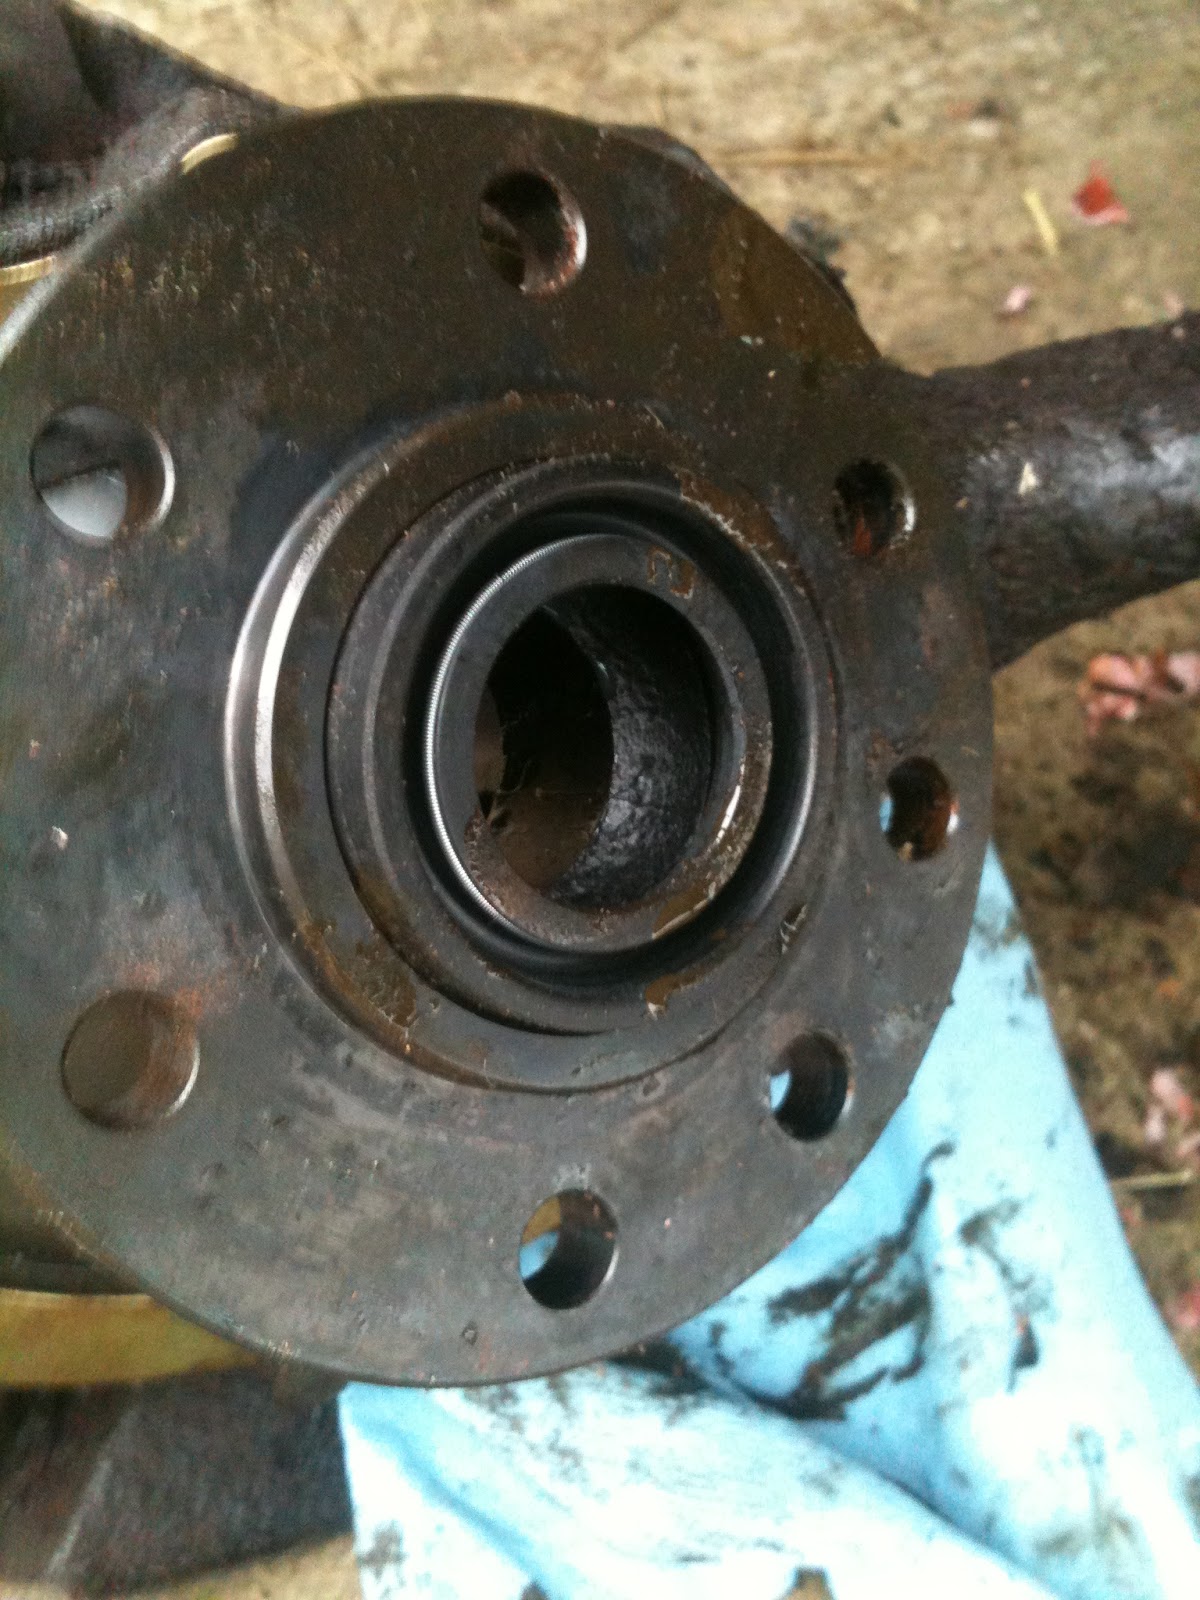
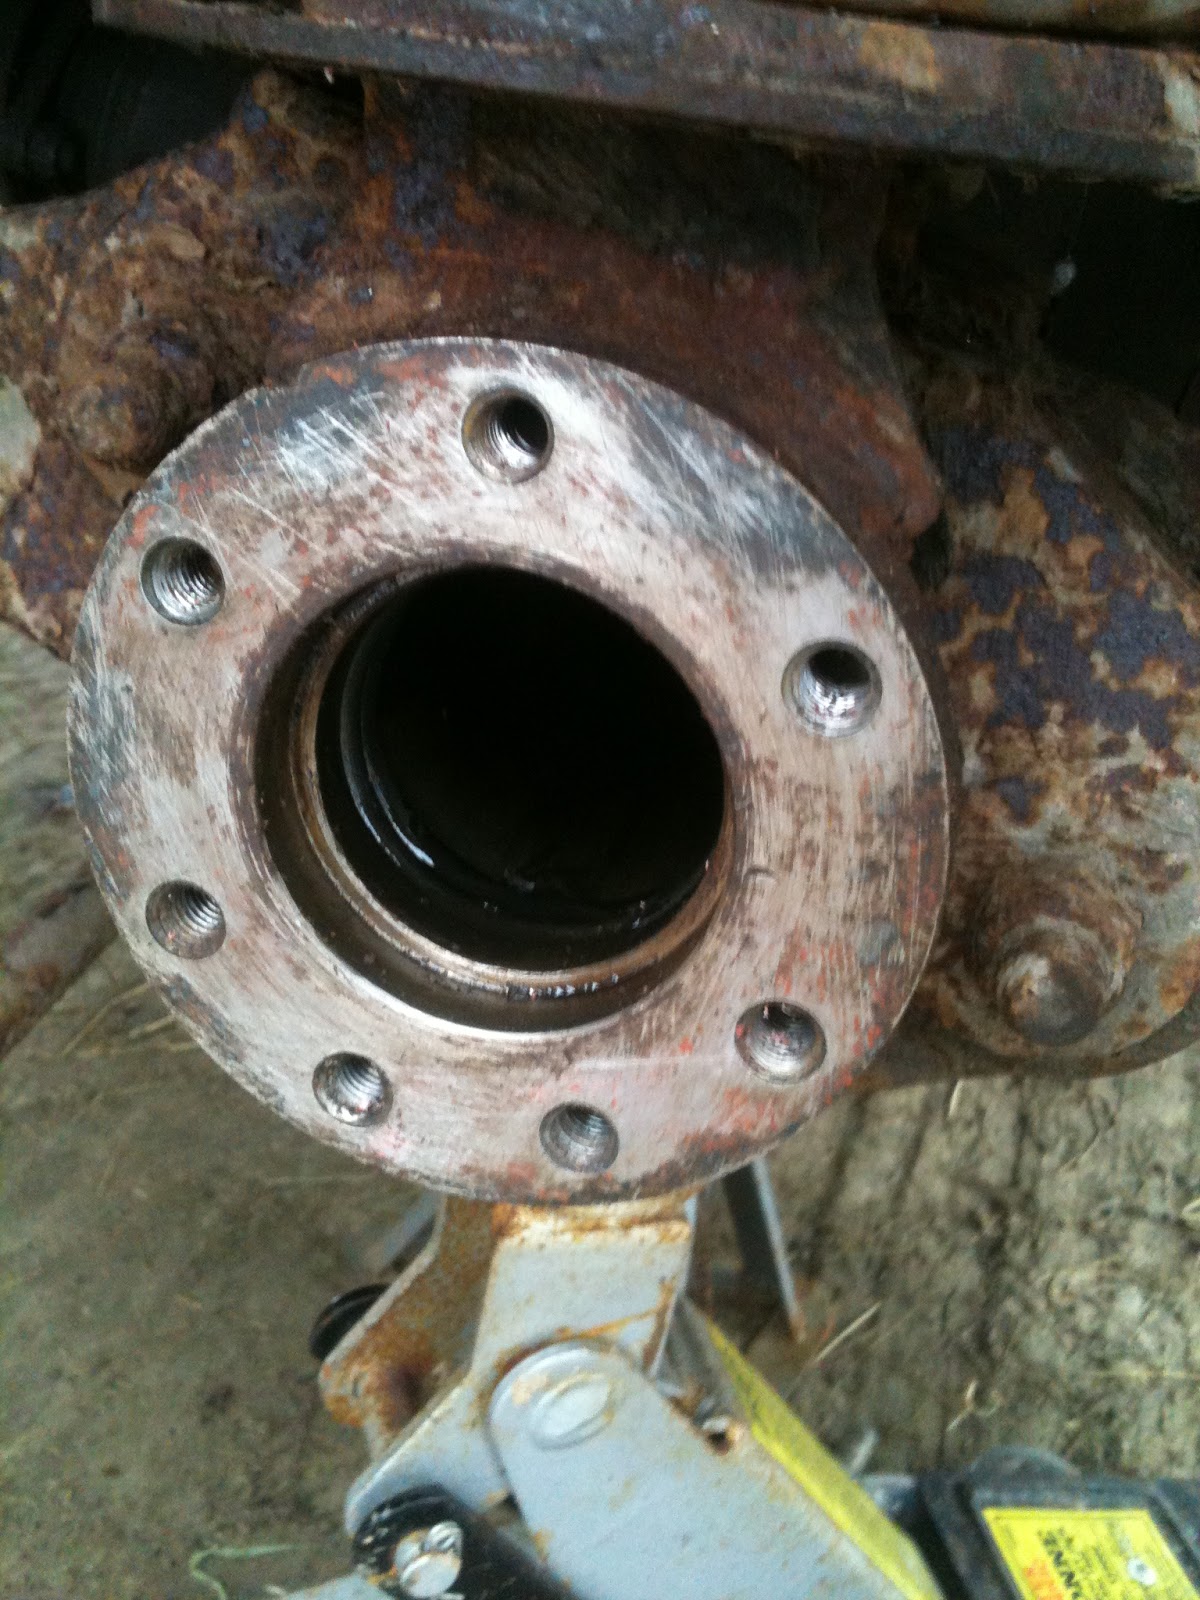
In the photo above you can see the oil seal retaining plate and the large outer oil seal in place, and the hub bolted in place.  And the more observant of you will have spotted the 'deliberate mistake'

Clearly, I did not.

So, fully unaware of this (I will point it out, but first a bit of suspense, possibly) I started the re-assembly.  Outer hub re-fitted and the gasket removed.

I had carefully inspected the driveshaft which was absolutely fine, so was re-greased and carefully inserted, and the CV joint put in place.
I then started putting on the front of the hub, laying the gasket in place....

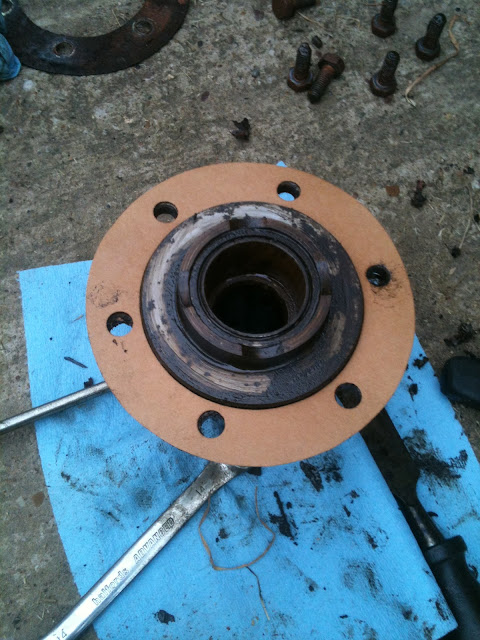
...ah, but I have 3 gaskets, one for the outer drive hub, this one and...... damn and blast.

At the point of fitting the swivel hub a couple of things happened.  Firstly, the family were with me at the yard, as my wife and daughter were riding their horses and I was distracted by something or other which needed doing, and secondly, and perhaps most importantly, I was starting to rush, to beat the fading light and the desire for the rest of the family to go home.  So somehow managed to forget to fit the gasket.

Oops.

Based on the light and the time, I loosely fitter the hub outer, the brake disc and the drive hub - all loosely, and covered the whole assembly to keep it dry.

Yesterday, I got back to the yard and completely stripped and rebuilt the hub, AGAIN.  This time, with more haste and less speed (but, to be fair, I'm getting reasonably familiar with stripping hubs down) and rebuilt it. Correctly.

However, unfortunately, short of time yet again, there are a few more tasks before I can declare this section complete:

I have not set the shims on the bearing pins (using spring gauge) to avoid the dreaded steering 'tank slap' sensation from bump steer; properly torqued up the 52mm hub nuts or filled the hub with grease (definitely the very last task!). So more next week......weather permitting!

5 Feb 2013

Diary of a Range Rover restoration - Part 3

Phil Wall is restoring a 1989 Range Rover Classic. We'll be bringing you regular updates on progress. To find the rest of the restoration diary use the label 'RR Restoration'

Swivel hub - Part 1

After a number of days of work and equestrian distraction I set about replacing the top bearing in the o/s/f (UK drivers side) front swivel hub.

First job was to remove the discs / hub casting - the issue being the MOT test had shown the front brakes are 'extremely tight'.  Once I'd removed the retaining bolts, I realised just how bad things were. The split pins were too tight to remove with the calliper in place, so I had to knock the calliper off with a lump hammer. Not subtle, but, as it turns out, effective....It looks pretty corroded, but I got the split pins and pads out (plenty of wear left on the pads) but the pistons looked seized. Before removing the brake lines, I started the engine and pressed lightly on the brakes.  2 of the 4 pistons moved.  Clearly, the only thing to do next was push harder...the 3rd piston moves.  But not the 4th - and stubborn it remained, no matter how hard I pressed the pedal. 

At this point I decided that this was very clearly a job for another day and have 'stored' it on the chassis frame, brake pipes intact (although with a liberal coverage of WD40 on the fixings).

The next job, in order to feel like there was some sense of achievement from the day, was to remove the end hub, which transfers drive to the wheel / disc.  All the bolts looked in bad shape - but cracked easily and the hub pulled out gently with little friction or resistance.

It looks in to be in decent shape, without any wear. The gasket was virtually none existent, but I scraped the remainder off the face of the seal.

A quick referral to the "Haynes Book of Lies" suggested I was still on the right track, but the end bearing nuts looked rather rusted.  No matter, I drifted back the locking sleeve and doused them in WD40 then looked for my 52mm socket.

Which didn't exist.

That stopped play for the day.  I went and ordered one from Rimmer (along with a new distributor cap, rotor arm, and 2 sets of caliper seals.)  Also, while I was on the internet, I may have ordered a new rolling toolbox and some ratchet spanners. In my defence, they were on sale...
All the ordered stuff arrived during the week so I restarted again this afternoon - in spite of it being 0°C (32°F).

The hub nuts seemed tight with a standard ratchet.  But with a 3ft breaker bar came off a treat - as did the swivel bolts (upper and lower), the disc guard and the rear seals for the swivel joint.  The joint didn't appear to have lost much grease, and the CV joint and inner drive shaft were all OK
The outer hub looks OK, but all the seals have disintegrated. However, it's fair to say this is a bloody messy job with the hub grease getting everywhere, no matter how careful you are.  I only had a bit of a roll of kitchen towel with me which soon got used up, and I got through 4 pairs of latex gloves.
The upper bearing looked in bad shape, however, so I compared it to the new one.
The photo is a rather fuzzy (perhaps from the shivering - I was getting a bit cold at this point) but believe me the current bearing is knackered. I had been told that removing 1 or 2 shims would fix the play in the joint, but changing the bearing is clearly the right thing to do and I started to look at the swivel hub to drift out the bearing surround.
However, once I'd cleaned off the grease it turns out this will not be necessary as the hub is badly pitted (bugger!) and therefore will have to be changed.  Note: for some reason I can't rotate the photos to put them the right way up!)

Front of hub:
Rear of hub:
I then had to put the whole assembly back together again and cover it in a plastic bag to protect it from the elements.  But hopefully I'll pick a new hub up from Town & Country Land Rover during the week and (weather permitting) I'll get this sorted next weekend.

On a brighter note, my mate Simon turned up with his new and very cool (in matt black and gold) single speed bike and I also managed to assemble a range of Range Rovers at the yard this weekend.  So, all in all, not a bad day if a touch cooler, and a lot less productive than I would have preferred.

29 Jan 2013

Diary of a Range Rover restoration - Part 2

Phil Wall is restoring a 1989 Range Rover Classic.  We'll be bringing you regular updates on progress.   To find the rest of the restoration diary use the label 'RR Restoration'

Basic Tuning

In order to get going, I've not really made use of the various online LR parts websites as the post over Christmas and New Year would have been unlikely to deliver in time.  Instead, I have used Halfords and a local Land Rover specialist.

There are 2 clear priorities on The List
  1. Get the engine running right - (emissions are currently so visibly bad, the MOT was abandoned before it got started)
  2. Sort the play in the O/S/F swivel hub
For the engine: simple stuff first - new oil, new plugs new leads. Went for the OE spec Champion plugs - which seem to divide the online forums as to whether they are a good choice or not, but as they were the only plugs at Halfords, it made it an easy decision for me.

No major issues with the plugs, I changed the plugs and leads one-by-one so shouldn't have managed to get them in the wrong order!

The oil change was slightly more entertaining.  There's a little emulsion inside the oil filler cap but, as there was not residue in the main oil, I'm assuming this is due to condensate from it being left standing for a few years.  I've cleaned it out thoroughly though, so time will tell.

Warmed the engine for the oil and filter change.  I bought an oil drain can from Halfords and positioned  it under the sump - undid and then DROPPED the plug, realised the tin was nowhere near the 'landing site' of the oil, but quick reactions meant only a small amount of oil hit the floor. Until, I realised the oil drain can could not cope with the flow of oil, and at least 2 litres of oil overflowed before I could collect and re-insert the sump plug. 

I then had to hold the plug in the threads to control the flow to a level which the drain tin could cope with and immediately started regretting warming the engine quite so much as, although not burning, it was uncomfortably hot. The filter change and re-fill went without incident and I can't see any new signs of emulsification.

However, the engine is now starting and running alot more smoothly.  Although I have noticed that it idles OK at first from a cold start, the idle speed rises as the engine warms, from 900rpm up to 1300rpm which I'll need to get to the bottom of.  Still, there are significantly less emissions from the tailpipes!

This probably warrants gratuitous shots of the engine with rather unnoticeable new plugs and leads.


So, to the O/S/F Swivel hub. I dropped into Town and Country 4x4 centre in Cubbington, near Leamington Spa, to ask about cost of replacements.  Full swivel hub replacements are circa £65.  Not outrageous, but the guys were surprised that a full replacement might be necessary - and instead sold me a £9 top bearing as they felt this would be the only item needed. 

Nice to be talked down from a major purchase to what I might need instead. They seemed far more concerned with me getting what I need, and the project itself, rather than the most they could sell me in one go. 

I am now hoping to get a set of wheels and off-road tyres from them as well as dropping off all the corroded brake pipes to have them make me some copper replacements. 

I'll hopefully get the time to replace the bearing this weekend, which will also mean I'll have the caliper off to have a go at freeing up the the front brakes on one side of the axle.

22 Jan 2013

Diary of a Range Rover restoration - Part 1

Phil Wall is restoring a 1989 Range Rover Classic.  We'll be bringing you regular updates in Diary of a Range Rover restoration (label 'RR Restoration').  In part 1 Phil tells us how he came upon the Range Rover and mulls what work needs doing.

The Beginning

This is a blog of two firsts - my first time blogging, and the first time I have attempted to restore a Range Rover Classic, in fact the first true restoration of any vehicle I've owned, as opposed to the 'keeping it on the road' variety of maintenance.

As I've been driving rather nice company cars for the last 7 years, this is the first bit of proper spanner wielding I've done in quite some time and will be very honest about the successes, failures and costs involved.

I wanted to keep a log of the work and thought a blog might be an interesting new way to do this, and I may even get some helpful knowledge and advice from those who have been through this before.

I'll start with a little bit of history as to the how and why I now own this MOT-less 1989 Range Rover...

A couple of years ago, we decided that we needed to move our horse out of local livery and started looking for a suitable piece of land of our own (living in Warwickshire, trading up to a house with 'Room for a Pony' requires a substantial mortgage), but we found a 5 acre yard with stables and a ménage near Southam, in a beautiful location with plenty of bridleways nearby. This was the point at which I realised I now had the perfect excuse to buy a tractor. Which, with limited funding, is easier said than done, as it turns out.  Plan B was required.

Plan B has changed over time - it started out as being an old Land Rover or 4x4 of some description, in running order but no MOT or chance of one, which could be used to pull paddock rollers, chain harrows and paddock slitters around doing general paddock care until it expired, to be replaced.

Various discussions with work colleagues turned up a 1992 Range Rover, CAT D write-off due to rear impact.  But unfortunately I narrowly missed out on this one.... but what if I now bought a decent Range Rover Classic and restored it so it was MOT worthy? 

It would mean I could swap back my Discovery 4 for a Jaguar and use the Classic in cases of inclement weather... and Louise's (Mrs W) Range Rover Sport would be the tow car.  Now that felt like much more of a plan!

The car I bought (unseen!) is from a colleague who was the 5th owner and bought it in 2003. It has spent the last 4 years in a garage awaiting restoration.

So that's the back story complete - but where am I with this now?

I dropped G184YND off at Crossroads Garage, Napton for Jim to give it the once over, and provide me with a list of what would deliver an MOT fail - a 'To Do' list for me over the coming months, if you will.

The list is long, but thankfully shorter than I expected - but challenging in areas.  So here the journey and the spanner wielding begins!